With the release of Tasker Version 2.7, setting up tasks in Tasker is as simple as sending an email—literally! Email was our #1 competitor, but we figured out a way to utilize email to our advantage and incorporate it into our processes. Now users can assign a task in Tasker by sending an email in Microsoft Outlook using the Quick Steps functionality. With Quick Steps, you can create buttons for assigning yourself tasks in Tasker, and for creating suggested tasks that are sent to your Tasker global task administrators for adjudication.
All you need to do prior to this setup is ensure that receiving emails is enabled in your ServiceNow instance. Also make sure that your email address is added to Tasker. You can verify or add your email from your Tasker profile by clicking on your name in the upper right-hand corner and selecting Profile.
How do I set up my Microsoft Outlook Task button?
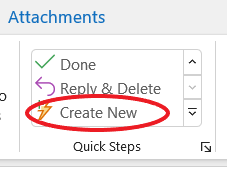
Start by logging in to your Microsoft Outlook account and navigating to the Home tab. You will see the Quick Steps window with an up- and down-arrow toggle feature. Scroll down and select Create New.
Traditional View Collapsed View
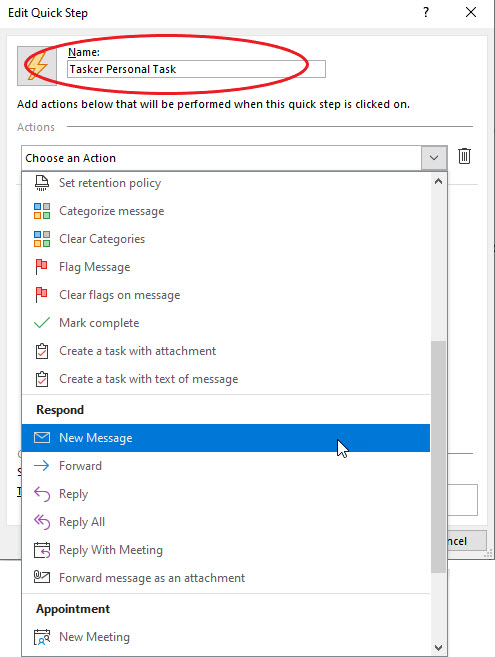
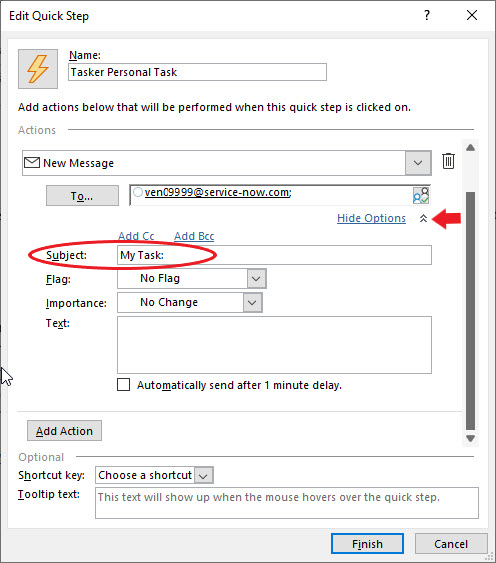
Once the Edit Quick Step box pops up, enter a name (e.g. “Tasker Personal Task” or “Suggested Task”). Next, click the Choose an Action drop-down menu and select New Message under the Respond section.
In the To… field, enter in the email address of your ServiceNow instance. If you do not know the ServiceNow email address, contact your administrators or IT Help Desk, or follow these steps:
- Navigate to Tasker.
- Copy “venXXXXX.service-now.com” from the browser URL.

- Paste into the To… field in the Edit Quick Step screen (as shown above).
- Replace the period preceding “service-now.com” with the @ symbol. For example, if your URL browser contains https://ven09999.service-now.com, the email address would be ven09999@service-now.com.
Next, select Show Options highlighted in blue on the bottom right-hand side, directly underneath the To… field. The box will expand to reveal additional fields. For personal tasks, enter the prefix “My Task:” into the Subject line. Always add the colon (:) following your prefix! For suggested tasks, which will be sent to your Tasker global task administrators for consideration and assignment, enter the prefix “Tasks:”. Fill in any additional details as desired (i.e. Flag, Importance, Text, Shortcut key, Tooltip text) and click Finish. Easy as pie!
Now that I have set up the Quick Step feature, how do I send an email to create a task?
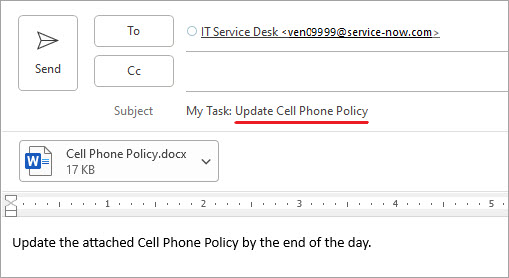
It is quick and easy! Just visit the Home tab in Microsoft Outlook and select the Tasker Personal Tasks button you set up in the Quick Steps menu. As desired, update the Subject to the right of the colon (:) and enter text in the email body.
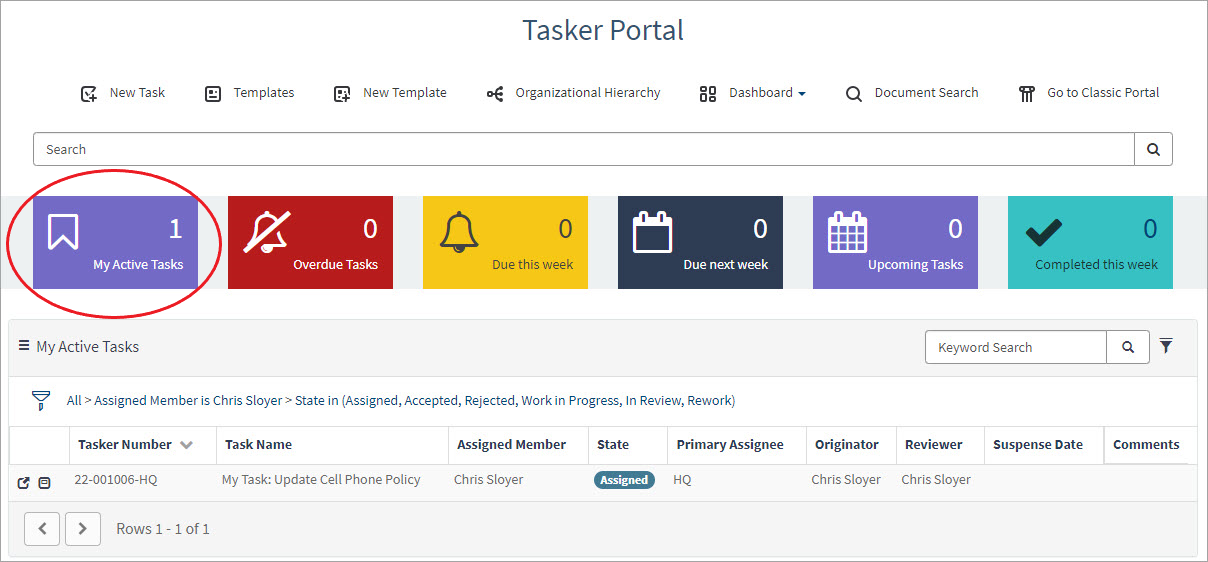
Once you have sent the email, navigate to your Tasker portal and get to work on your task! Depending on your ServiceNow settings and the frequency your ServiceNow instance is set to receive email, it may take a couple of minutes for the task to be added to your Active Tasks.